There’s nothing like the joy of baking sourdough bread at home. The golden crust and soft inside are a treat. Plus, the tangy flavor is unique and delicious.
But, making sourdough can seem hard. Don’t worry, we’ve got you covered. This guide will show you how to bake perfect sourdough bread in your own home.
Sourdough bread is a labor of love. It is made through natural fermentation, using wild yeasts instead of commercial yeast. This process requires both time and patience, beginning with the preparation of a starter culture.
Table of Contents
It all begins with a starter culture, which is the foundation of sourdough, consisting of wild yeasts and bacteria. With practice, you’ll be able to bake bread as delicious as what you’d find at any bakery.
In this guide, we’ll cover the history, ingredients, and steps to make sourdough. Whether you’re a beginner or an experienced baker, this will help you hone your skills and become an artisan in your own kitchen.
What Is Sourdough Bread?
Sourdough bread is a special baking tradition. It’s different from regular bread because it uses a live starter. This starter has lactobacillus and acetobacillus bacteria, plus wild yeast. Together, they create the sour taste and make the bread rise naturally.
Understanding Sourdough Culture
The sourdough culture plays a crucial role in this bread. The bacteria and yeast in the culture ferment the dough’s sugars, producing lactic acid that gives sourdough its signature tangy flavor. This fermentation also helps break down gluten, making the bread more digestible.
The History of Sourdough Bread
Sourdough bread has a long history.Sourdough’s origins trace back to the Fertile Crescent and Egypt around 3700 BCE. It came to Northern California during the Gold Rush and became a San Francisco favorite. Now, it’s loved by home bakers and artisan bakeries everywhere.
Essential Ingredients for Sourdough Bread
Making sourdough bread at home is all about the right ingredients. You’ll need whole grains, high-protein flour, and filtered water. Let’s explore each ingredient and why they’re crucial for sourdough.
Flour Types You Need
For flour, choose a bread flour with 11.7% to 12.7% protein. This type of flour makes the bread soft and chewy. Adding a bit of whole wheat flour can also boost flavor and nutrition.
Water Quality Matters
The water you use is important for sourdough bread. Use filtered water to get the right mineral balance for fermentation and dough development.
The Role of Salt
Salt is key in sourdough bread. It adds flavor and strengthens the dough. Use fine-grained sea salt or kosher salt for the best taste and texture.
With these ingredients, you’re ready to make delicious sourdough bread at home. Enjoy the process, try different flours, and let your sourdough starter lead you to success.
Getting Started: Creating a Sourdough Starter
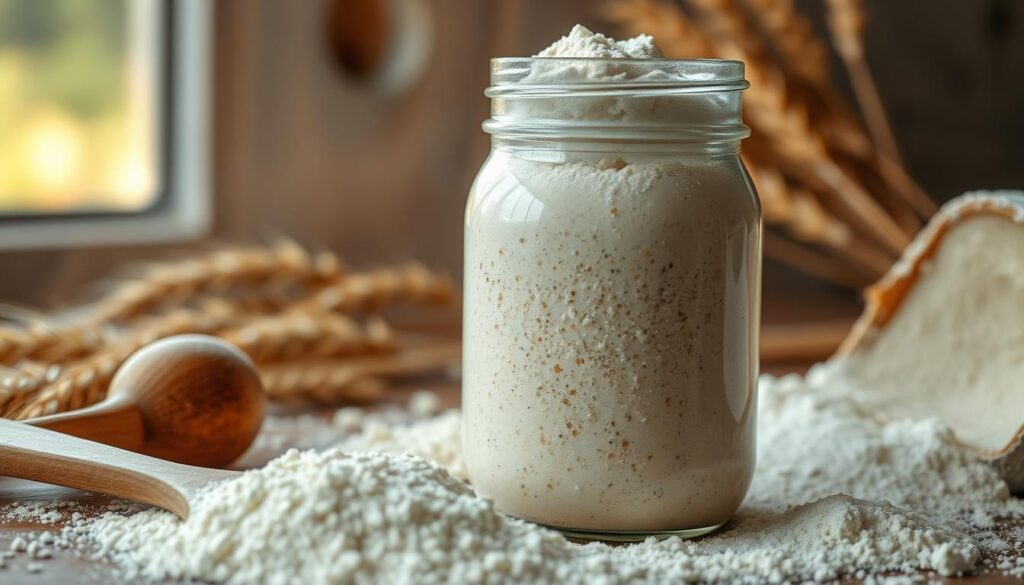
Starting your sourdough baking journey means making your own starter. A sourdough starter is a mix of wild yeast and good bacteria. It’s made by mixing flour and water and letting it ferment. This starter is key to baking tasty sourdough bread at home.
What is a Sourdough Starter?
A sourdough starter is a mix of flour and water that’s fed and fermented often. It lets natural yeasts and bacteria grow. As it matures, it gets a tangy taste and can make bread rise. With the right care, a starter can last for years or even decades!
Step-by-Step Starter Recipe
Making a sourdough starter is a fun and rewarding task. Here’s a simple guide to start:
- In a clean jar, combine 75 grams of all-purpose flour and 25 grams of whole wheat flour with 100 grams of water.
- Cover the jar for 24 hours at room temperature .
- After 24 hours, throw away half of the mix. Add 60 grams of flour and 60 grams of water. Stir well.
- Discard half of the mixture. Then, add 60 grams of flour and 60 grams of water, and stir thoroughly.
When your starter is ready, it’s time to use it in sourdough bread recipes. Don’t forget to feed it often to keep it alive and healthy!

Feeding and Maintaining Your Sourdough Starter
Keeping your sourdough starter healthy is crucial for baking. A regular feeding schedule is key to keeping it active and lively.
Frequency of Feeding
At room temperature, feed your starter twice a day, morning and evening. If you keep it in the fridge, once a week is enough. Always let it rest at room temperature for 2 hours after feeding before putting it back in the fridge.
Signs of a Healthy Starter
- The starter should double or triple in volume within 6-8 hours after being fed.
- Forming visible bubbles on the surface and along the sides of the container
- Developing a pleasantly sour aroma, not overly acidic
The right starter maintenance and feeding schedule depend on your kitchen’s temperature and flour type. Try different routines to keep your starter health at its best.
| Starter Maintenance Guideline | Room Temperature | Refrigerated |
|---|---|---|
| Feeding Frequency | Twice a day | Once a week |
| Resting Time After Feeding | 2 hours | 2 hours |
| Typical Feeding Ratio | 20g starter, 70g AP flour, 30g rye flour, 100g water | 20g starter, 70g AP flour, 30g rye flour, 100g water |
Mixing Your Sourdough Dough
Mixing the perfect sourdough dough needs precision and understanding of key techniques. The first step is the autolyse. Here, you mix flour and water, letting enzymes do their work.
Autolyse: The First Step
Begin by mixing your dough hydration – water to flour ratio. A common mix is 500g flour to 350g water. Adjust this based on flour type and desired bread texture. let it sit for 30 minutes to an hour.
This autolyse technique lets flour enzymes break down proteins. It develops the gluten structure.
Ingredients Measurement Tips
Accurate precise measurements are key for consistent sourdough. Use a digital kitchen scale for flour, water, starter, and salt. This ensures the right balance for optimal rise and texture.
Avoid volume measurements like cups. They can be less precise.
After autolyse, add sourdough starter and salt. Mix well to avoid dry spots. With the right dough hydration, autolyse technique, and precise measurements, you’re on your way to a perfect sourdough loaf.
Kneading Techniques for Sourdough
Kneading is key in making sourdough bread. It develops the gluten that makes the bread light and airy. Many prefer the “stretch and fold” technique as an alternative to traditional kneading.
Why Kneading is Important
Kneading strengthens the gluten in the dough. This makes the dough stable and elastic. It can hold its shape during fermentation.
A well-kneaded dough is smooth and can stretch far without breaking.
Different Kneading Methods
Traditional kneading is vigorous and lasts 15 minutes. But, the stretch and fold method is favored for sourdough. It involves gently stretching and folding the dough several times.
This method strengthens the dough without overworking it. It’s gentler than traditional kneading.
The coil fold is another method. It’s great for high-hydration doughs that are hard to knead. You fold the dough into a cylinder shape.
It’s important to let the dough rest for 20 minutes after each fold or knead. This technique helps the gluten relax and strengthen, preparing the dough for the next stage.
Proofing Your Sourdough Bread
Proofing is a key step in sourdough baking. It’s where the dough rises to develop flavor and texture. Getting proofing right can turn a dense loaf into a light, airy one.
Bulk Fermentation Explained
Bulk fermentation is the first rise. It happens at room temperature for 4-8 hours. The dough should grow by 50-75%, showing a healthy sourdough culture.
How Long Should You Proof?
- For cold proofing, leave the dough in the fridge for 8 to 18 hours. This gives a more sour taste.
- At warm room temperature, it takes 1 1/2 to 3 hours for the dough to rise.
- Use a proofing basket or a floured cloth-lined bowl for the final proof. It lasts 1-2 hours at room temperature.
The dough is oven-ready when it springs back slowly after a gentle poke. Timing and temperature are key for a perfect proof in long fermentation and dough rising.
| Proofing Temperature | Proofing Time |
|---|---|
| 80°F (26°C) | 1 to 2 hours |
| 74 to 76°F (23-24°C) | 2 to 4 hours |
| 46°F (8°C) | 6 to 8 hours |
| 39°F (4°C) | 10 to 16 hours |
Shaping Your Sourdough Loaf
Getting the perfect sourdough loaf begins with the right shaping. How you shape your dough affects its texture, look, and quality. Let’s explore the essential steps to shape your sourdough dough expertly.
Techniques for Shaping
To shape your sourdough dough tension is key. Start by stretching and folding the dough into a tight boule (round shape). This method helps in creating a smooth, tight outer layer. Avoid overworking the dough to keep it from losing its texture.
- Lightly flour your work surface to prevent sticking.
- Carefully stretch the dough into a rectangle, then fold the sides toward the center.
- Flip the dough over and use your hands to shape it into a tight, round boule.
- Turn the dough while folding the edges underneath to build surface tension.
- Transfer the shaped dough to a proofing basket or lined baking sheet, seam-side down.
Common Mistakes to Avoid
When shaping your sourdough, watch out for these common errors:
- Overhandling the dough: This can cause the dough to lose its structure and deflate.
- Insufficient surface tension: If you don’t create enough tension, the dough may spread and result in a flat, unappealing loaf.
- Excessive use of flour: Using too much flour during shaping can dry out the dough and lead to a dense, dry crumb.
Remember, the secret to successful sourdough shaping is gentle handling, maintaining dough tension, and achieving a smooth, tight surface shaping for your boule. With practice, you’ll master shaping your sourdough loaves like a pro.
Baking Your Sourdough Bread
Baking sourdough bread at home is very rewarding. The secret to a perfect crusty loaf is a good oven environment. Making sure there’s steam during baking is key. The steam injection method helps create the sourdough crust and an airy crumb.
Creating Steam in the Oven
For proper steaming, preheat your oven to 450°F (232°C) with a Dutch oven inside.. Then, put your dough in the hot Dutch oven, cover it, and bake for 20-30 minutes. This steam helps your bread score well and rise.
Baking Time and Temperature Tips
After baking covered, take off the lid and bake for another 15-20 minutes. This lets the crust get that deep, golden color. Your bread will bake for 35-45 minutes. It’s done when it’s 205°F (96°C) inside and sounds hollow when tapped.
Remember, baking perfect sourdough takes practice and patience. Be mindful of visual cues and the unique characteristics of your oven. Soon, you’ll be making artisanal loaves at home!

Troubleshooting Common Sourdough Issues
Mastering sourdough baking takes time and effort. But don’t worry if you face some problems. We have solutions for common sourdough bread issues like dense loaves and lack of rise.
Dense Bread Solutions
A dense sourdough loaf might be due to under-proofing, a weak starter, or not enough gluten. Ensure your sourdough starter is active and thriving by maintaining it at a temperature of 74-76°F (23-24°C) for optimal results.
Give your dough enough time to proof. This is key for building a strong gluten structure. It makes your bread light and airy.
Why Your Loaf Might Not Rise
If your sourdough bread doesn’t rise, it might be over-proofing. Over-proofing weakens the gluten, stopping the loaf from rising. Keep the dough temperature right and watch the fermentation closely.
Adjust your hydration levels or flour types if needed. With practice, you’ll get the rise just right every time.

